 Cooking
Ingredients
You will need the following ingredients to prepare one serving of microwave mug bread.
- 4 tablespoons all-purpose flour
- 1/4 teaspoon baking powder
- A small pinch of salt
- 1 tablespoon milk
- 1 tablespoon plain yogurt
- 1 teaspoon vegetable oil or melted butter
- 1–2 teaspoons water, if needed
Optional ingredients:
- 1/4 teaspoon garlic powder for savory bread
- 1/4 teaspoon dried oregano or mixed herbs
- 1 teaspoon sugar for a slightly sweet flavor
- 1 tablespoon grated cheese
- A pinch of black pepper for extra flavor
The basic recipe uses baking powder instead of yeast, so there is no need to wait for the dough to rise. Yogurt helps create a tender texture, while a little oil or butter keeps the bread from becoming too dry.
Instructions
Step 1: Choose the Right Mug
Select a microwave-safe mug with a capacity of at least 10–12 ounces. A wider mug is especially useful because it allows the bread to cook more evenly.
Make sure the mug is clean and dry before adding the ingredients. Avoid mugs with metallic decorations or materials that are not labeled microwave-safe.
Step 2: Mix the Dry Ingredients
Add the all-purpose flour, baking powder, and salt directly to the mug.
Use a fork to mix the ingredients thoroughly. This step is important because evenly distributing the baking powder helps the bread rise more consistently during cooking.
If you want savory bread, add garlic powder, dried herbs, or black pepper at this stage. For a slightly sweet version, mix in the sugar instead.
Step 3: Add the Wet Ingredients
Pour the milk, plain yogurt, and vegetable oil or melted butter into the mug.
Stir everything together until the flour is fully incorporated. The mixture should resemble a thick, soft batter or a very sticky dough, depending on the flour and yogurt you use.
If the mixture looks too dry or crumbly, add water a little at a time. If it seems excessively runny, add another teaspoon of flour.
Avoid overmixing. Stir just until there are no obvious dry pockets of flour. This helps keep the finished bread tender rather than dense.
Step 4: Smooth the Mixture
Use the back of your spoon to level the mixture inside the mug. Make sure it is spread fairly evenly so that the center and edges can cook at a similar rate.
If you are adding grated cheese, gently fold it into the mixture before smoothing the top.
Do not fill the mug more than halfway if possible, as the bread may rise during cooking. A larger mug gives the mixture enough room to expand.
Step 5: Microwave the Bread
Place the mug in the center of the microwave.
Cook on high power for approximately 60–90 seconds to begin with. Microwave cooking times vary depending on the appliance’s wattage, the mug’s shape, and the moisture content of the mixture.
After the first minute, check the bread. The surface should look set rather than wet, and the center should not contain raw batter. If needed, continue cooking in 10–15-second intervals.
Some microwaves may require closer to two minutes. Avoid cooking the bread for too long, as excessive microwave heating can make it rubbery or dry.
For food safety, ensure the center is fully cooked before eating. If you have a food thermometer, check that the center reaches at least 165°F (74°C).
Step 6: Let It Rest
Carefully remove the mug from the microwave using an oven mitt or thick towel because it may be very hot.
Allow the bread to rest for about one minute. This short resting period helps the texture settle and makes the bread easier to remove.
Run a butter knife around the inside edge of the mug if necessary. Gently tip the bread onto a plate, or simply eat it directly from the mug.
Step 7: Serve and Enjoy
Your quick microwave mug bread is ready to enjoy!
For a richer flavor, spread a little butter over the warm bread. You can also slice it horizontally if the shape allows, then add cheese, scrambled eggs, or other sandwich fillings.
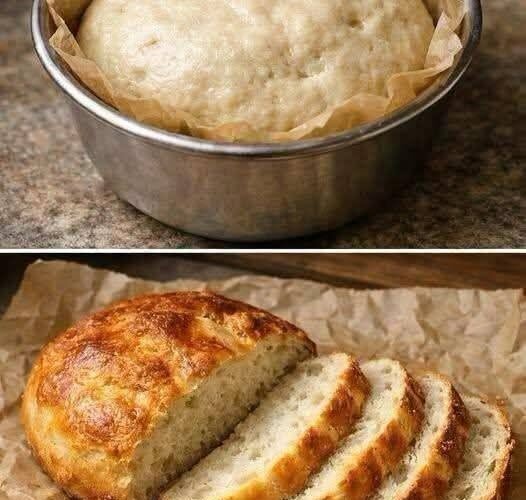
Because this is a small, yeast-free bread, its texture will be somewhat different from a traditional oven-baked loaf. Expect a soft, compact crumb rather than a crusty exterior.
Tips for Perfect Microwave Mug Bread
Measure the flour carefully. Too much flour can make the bread dry and heavy. Spoon the flour into the measuring spoon and level it rather than packing it tightly.
Use fresh baking powder. Baking powder provides the lift in this recipe. If it is old or has lost its effectiveness, the bread may turn out dense.
Choose a wide mug. A wide mug helps the mixture cook more evenly than a very narrow, deep cup.
Adjust the cooking time gradually. Start with a shorter cooking time and add a few seconds as necessary. It is easier to finish cooking slightly undercooked bread than to rescue bread that has become overcooked.
Do not expect a crispy crust. Microwaves heat food differently from conventional ovens. The bread will generally be soft on the outside. For a toasted finish, slice the cooked bread and toast it briefly in a skillet or toaster if its shape and thickness allow.
Allow it to rest. One minute of resting makes a difference in texture and reduces the risk of burning your mouth.
Delicious Variations
1. Garlic Herb Mug Bread
Add garlic powder, dried oregano, and a little extra butter to the basic mixture. Once cooked, brush the top with melted butter and sprinkle with additional herbs. This version is excellent alongside soup, pasta, or a salad.
2. Cheesy Mug Bread
Stir one tablespoon of grated cheddar or mozzarella into the batter. Add a pinch of black pepper for extra flavor. The cheese makes the bread richer and gives it a delicious savory taste.
3. Sweet Breakfast Mug Bread
Add one teaspoon of sugar and a small pinch of cinnamon to the mixture. Once cooked, serve with honey, jam, or peanut butter. You can also add a few raisins if desired.
4. Whole-Wheat Mug Bread
Replace half the all-purpose flour with whole-wheat flour. You may need a little extra milk or water because whole-wheat flour absorbs more liquid. The result will be heartier and slightly denser.
5. Spicy Mug Bread
Add a pinch of chili powder, paprika, and black pepper. This variation works well with eggs, chutney, or a savory dip.
What to Serve with Microwave Mug Bread
This versatile bread can be enjoyed at almost any time of day.
For breakfast, pair it with scrambled eggs, an omelet, butter, or jam. For lunch, use it as a quick base for a small sandwich filled with cheese, chicken, tuna, or vegetables. At snack time, serve it with hummus, yogurt dip, or your favorite chutney.
You can also enjoy it with warm soup, lentils, or curry. The mild flavor makes it a convenient accompaniment to many different meals.
Storage and Reheating
Microwave mug bread tastes best immediately after cooking because it can become firm as it cools.
If you have leftovers, allow the bread to cool completely and store it in an airtight container in the refrigerator for up to two days. Reheat briefly in the microwave, using short intervals to avoid drying it out. Check that it is heated thoroughly before eating.
Freezing is generally unnecessary for such a small serving, especially because the recipe takes only minutes to prepare.
Frequently Asked Questions
Can I make mug bread without milk?
Yes. You can use an unsweetened plant-based milk instead. Water may also work, although the bread may have a less tender flavor and texture.
Can I make this recipe without yogurt?
Yes. Replace the yogurt with an additional tablespoon of milk, adding it gradually until the mixture reaches the right consistency. The result may be slightly less tender.
Why did my mug bread turn rubbery?
The most common reason is overcooking. Microwave power varies, so start with 60 seconds and add short bursts until the center is cooked. Too much flour can also make the bread tough.
Can I use self-rising flour?
Yes. Replace the all-purpose flour and baking powder with self-rising flour. Keep the salt minimal because self-rising flour may already contain salt.
Is microwave mug bread the same as regular bread?
No. This recipe uses baking powder instead of yeast and cooks with microwave energy rather than dry oven heat. It is a convenient quick bread with a soft texture, not an exact substitute for a traditional crusty loaf.
Can I double the recipe?
You can double the ingredients, but use a larger microwave-safe container and expect a longer cooking time. Cooking two separate mugs is often easier because each portion cooks more evenly.
Conclusion
This 5-Minute Microwave Mug Bread Recipe proves that making homemade bread does not have to be complicated or time-consuming. With flour, baking powder, milk, yogurt, and a few simple pantry staples, you can prepare a warm individual serving in just a few minutes.
The best part is its versatility. Keep it plain for breakfast, add cheese and herbs for a savory snack, or make a lightly sweet version to enjoy with tea or coffee. Once you learn how your microwave cooks the mixture, you can adjust the timing and ingredients to suit your preferences.
When you need quick, fresh bread without an oven, this easy mug recipe is a practical option to keep in your kitchen routine. Mix, microwave, rest, and enjoy!