
 Cooking
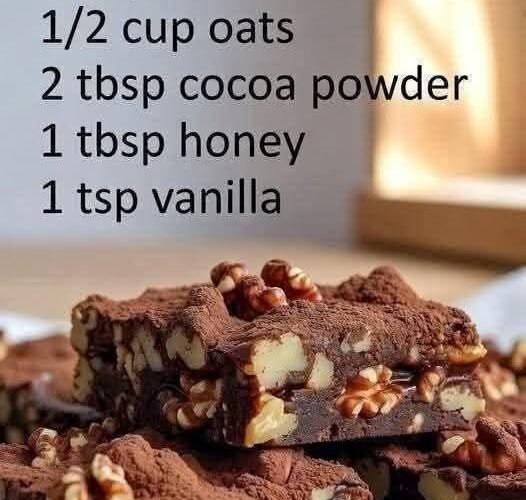
Ingredients
For the Chocolate Peanut Butter Layer
- 1 cup creamy peanut butter
- 1/2 cup unsalted butter, softened
- 1 cup powdered sugar
- 1 teaspoon vanilla extract
- 1 cup finely crushed digestive biscuits or graham crackers
- 1/4 teaspoon salt, optional
For the Chocolate Topping
- 1 cup semisweet chocolate chips
- 2 tablespoons peanut butter
- 1 teaspoon coconut oil, optional
For the Nutty Topping
- 1/3 cup chopped roasted peanuts
- 2 tablespoons chopped hazelnuts or almonds
- 1 tablespoon mini chocolate chips, optional
- A small pinch of sea salt, optional
Instructions
Step 1: Prepare Your Baking Dish
Choose an 8-inch square baking dish or a similar-sized container. Line it with baking paper, leaving a little extra paper hanging over the sides.
This makes it much easier to lift the dessert out after chilling and cut it into neat squares.
Set the prepared dish aside while you make the peanut butter mixture.
Step 2: Make the Peanut Butter Mixture
Place the creamy peanut butter and softened butter in a large mixing bowl.
Using a hand mixer or sturdy spoon, mix until the ingredients become smooth and well combined. Add the vanilla extract and a pinch of salt if desired.
Gradually add the powdered sugar, mixing after each addition. The mixture should become thick, creamy, and slightly firm.
If it feels too soft, add a little more powdered sugar or crushed biscuits. If it seems too dry, mix in a small spoonful of peanut butter.
Step 3: Add the Crushed Biscuits
Add the finely crushed digestive biscuits or graham crackers to the peanut butter mixture.
Stir thoroughly until the crumbs are evenly distributed. They help create a firmer texture that holds together when sliced.
The mixture should resemble a thick, soft dough. It should be easy to press into the baking dish without being overly sticky.
Step 4: Press the Mixture Into the Dish
Transfer the peanut butter mixture into your lined baking dish.
Use a spatula or the back of a spoon to press it into an even layer. Pay particular attention to the corners so the dessert has a consistent thickness.
Place the dish in the refrigerator for about 20–30 minutes while you prepare the chocolate topping.
Chilling this layer helps it firm up and prevents the chocolate from mixing into the peanut butter base.
Step 5: Melt the Chocolate
Place the chocolate chips in a microwave-safe bowl. Add the two tablespoons of peanut butter and the optional coconut oil.
Microwave in 20-second intervals, stirring after each interval, until the chocolate is melted and smooth.
Alternatively, place the bowl over a saucepan of gently simmering water. Stir until the chocolate melts, making sure the bottom of the bowl does not touch the water.
Avoid overheating the chocolate, as it can become thick or grainy.
Step 6: Add the Chocolate Layer
Remove the chilled peanut butter base from the refrigerator.
Pour the melted chocolate mixture over the top. Use a spatula to spread it evenly across the entire surface.
For a thicker chocolate topping, allow the chocolate to settle naturally rather than spreading it too thinly.
The combination of creamy peanut butter and smooth chocolate creates the classic flavor that makes this dessert so irresistible.
Step 7: Add the Nuts
While the chocolate is still soft, sprinkle the chopped roasted peanuts and hazelnuts or almonds over the top.
Add mini chocolate chips if you want an extra chocolatey finish. A tiny pinch of sea salt can also enhance the sweetness and bring out the chocolate flavor.
Press the larger nut pieces very gently into the chocolate so they stay in place when the dessert is sliced.
For a more elegant appearance, reserve a few nuts to sprinkle over the dessert just before serving.
Step 8: Chill Until Firm
Place the dish in the refrigerator for at least 1½–2 hours, or until the chocolate topping is firm and the peanut butter layer has set.
If you’re short on time, you can place it in the freezer for approximately 30–45 minutes. Check it regularly to ensure it doesn’t become excessively hard.
For the best texture, allow the dessert to chill in the refrigerator until it can be sliced cleanly.
Step 9: Slice and Serve
Once the dessert is firm, lift it out of the dish using the baking paper.
Place it on a cutting board and use a sharp knife to cut it into squares or small bars.
For cleaner cuts, warm the knife under hot water, wipe it dry, and slice gently. Repeat as needed.
Serve the squares chilled for a firm, fudgy texture. Let them sit at room temperature for a few minutes if you prefer a softer bite.
Enjoy the rich chocolate flavor, creamy peanut butter center, and crunchy nut topping in every piece!
Tips for the Best Nutty Chocolate Dessert
Use good-quality chocolate: Semisweet chocolate provides a balanced flavor without making the dessert excessively sweet.
Choose creamy peanut butter: Conventional creamy peanut butter generally gives the smoothest texture. Natural peanut butter can work, but stir it thoroughly first because separated oil may affect the consistency.
Chop the nuts evenly: Smaller pieces distribute more consistently and make the dessert easier to slice.
Do not skip chilling: The peanut butter base and chocolate topping need time to firm up properly.
Add a little salt: A small pinch of salt enhances the chocolate and peanut butter flavors.
Keep the chocolate smooth: Melt it slowly and stir frequently to prevent scorching.
Delicious Variations
Chocolate Hazelnut Version
Replace half the peanut butter with chocolate hazelnut spread. Add chopped toasted hazelnuts on top for a flavor reminiscent of chocolate-hazelnut candy.
Almond Chocolate Dessert
Use almond butter instead of peanut butter and top the dessert with chopped toasted almonds. This creates a delicious alternative with a slightly different nutty flavor.
Coconut Chocolate Version
Add two tablespoons of unsweetened shredded coconut to the peanut butter base. Sprinkle a little toasted coconut over the chocolate topping.
Extra-Crunchy Version
Mix additional chopped peanuts or almonds into the base and sprinkle more nuts over the top. This version is ideal for anyone who loves a crunchy texture.
Dark Chocolate Version
Use dark chocolate with a higher cocoa percentage for a deeper, less sweet chocolate flavor.
Storage Instructions
Store the dessert in an airtight container in the refrigerator for up to one week.
For longer storage, freeze the squares in a freezer-safe container with baking paper between the layers. They can generally be frozen for up to two months for the best quality.
Thaw frozen portions in the refrigerator or allow them to soften slightly at room temperature before serving.
Because this recipe contains peanut butter and chocolate, it may soften in a warm room. Keep it chilled until you’re ready to serve.
Frequently Asked Questions
Can I make this dessert without baking?
Yes! This is a no-bake recipe. Simply prepare the layers, chill them, and slice once firm.
Can I use another nut butter?
Yes. Almond butter or cashew butter can work well, although the flavor and consistency may vary.
Can I use milk chocolate?
Absolutely. Milk chocolate creates a sweeter topping. If you prefer a less sweet dessert, use semisweet or dark chocolate.
Is this dessert suitable for meal preparation?
Yes. You can make it ahead of time, cut it into individual portions, and store the pieces in the refrigerator or freezer.
Can I make it nut-free?
You can experiment with sunflower seed butter and replace the nut topping with toasted seeds or crunchy cereal. Check all ingredient labels for possible allergens.
Final Thoughts
This Nutty Chocolate Peanut Butter Dessert is an easy way to satisfy your chocolate cravings with a delicious combination of creamy, crunchy, sweet, and salty flavors.
The smooth peanut butter base, rich chocolate topping, and roasted nuts make every bite feel special. Whether you’re serving it at a party, preparing a homemade gift, or keeping a batch in the refrigerator for a sweet treat, this recipe is simple enough to make again and again.
Try different nut butters, experiment with dark chocolate, or add coconut for your own special twist.
If you love the combination of chocolate and nuts, save this recipe and share it with someone who would enjoy this delicious homemade treat!