Category: Italian Recipes

  • Best Roast Potatoes

    Best Roast Potatoes

    Best Roast Potatoes Recipe (Crispy Outside, Fluffy Inside)

    The perfect roast potato is a classic comfort food that combines two irresistible textures: a golden, crunchy exterior and a soft, fluffy center that melts in your mouth. Whether served alongside a Sunday roast, holiday dinner, grilled meats, or a simple family meal, beautifully roasted potatoes can transform an ordinary plate into something special.

    The secret to achieving the best roast potatoes is choosing the right potato variety, preparing them properly, and using techniques that create maximum crispiness. This recipe uses parboiling, roughing up the potato edges, and roasting at high heat with flavorful seasonings to produce restaurant-quality roast potatoes at home.

    This recipe serves 6โ€“8 people and works perfectly for family dinners, celebrations, and special occasions.


    Why You’ll Love This Recipe

    • Extra crispy golden coating
    • Soft and fluffy inside
    • Simple ingredients
    • Perfect side dish for any meal
    • Easy preparation
    • Great for holidays and gatherings
    • Can be prepared ahead of time

    Ingredients

    Main Ingredients

    • 2 kg (4.5 pounds) potatoes
    • 5 tablespoons olive oil or vegetable oil
    • 3 tablespoons unsalted butter (optional, for extra flavor)
    • 2 teaspoons sea salt
    • 1 teaspoon freshly ground black pepper

    Flavor Ingredients

    • 5 cloves garlic, lightly crushed
    • 4 sprigs fresh rosemary
    • 4 sprigs fresh thyme
    • 1 teaspoon smoked paprika (optional)
    • 1 teaspoon garlic powder
    • ยฝ teaspoon onion powder

    Optional Finishing Ingredients

    • Fresh parsley, chopped
    • Grated Parmesan cheese
    • Flaky sea salt
    • Lemon zest
    • Extra herbs

    Best Potatoes to Use

    Choosing the right potato makes a huge difference.

    The best choices are:

    Russet Potatoes

    These contain high starch levels, creating a fluffy interior and crispy exterior.

    Yukon Gold Potatoes

    These provide a naturally buttery flavor and beautiful golden color.

    Maris Piper Potatoes

    A popular choice for roasting because they become crisp outside while remaining soft inside.

    Avoid very waxy potatoes because they may not develop the same fluffy texture.


    Equipment

    • Large pot
    • Colander
    • Sharp knife
    • Baking tray
    • Parchment paper (optional)
    • Wooden spoon or spatula
    • Kitchen towel

    Preparation Time

    • Preparation: 25 minutes
    • Cooking: 50โ€“60 minutes
    • Total Time: About 1 hour 20 minutes

    Step 1: Prepare the Potatoes

    Peel the potatoes if desired.

    For a rustic style, you can leave the skin on after washing them thoroughly.

    Cut the potatoes into large, evenly sized chunks, approximately 5โ€“7 cm pieces.

    Keeping the pieces similar in size helps them cook evenly.

    Place the potatoes into a large bowl of cold water and rinse to remove excess starch.

    Drain well.


    Step 2: Parboil the Potatoes

    Place the potatoes into a large pot.

    Cover with cold water.

    Add a generous pinch of salt.

    Bring the water to a boil.

    Cook for approximately 8โ€“10 minutes.

    The potatoes should be slightly tender around the edges but still firm in the center.

    Avoid overcooking, as they may fall apart during roasting.


    Step 3: Drain and Rough Up the Potatoes

    Drain the potatoes thoroughly.

    Allow them to sit in the colander for a few minutes so excess moisture evaporates.

    Return the potatoes to the empty pot.

    Gently shake the pot several times.

    This roughens the potato surfaces and creates small fluffy edges that become incredibly crispy during roasting.

    This step is one of the most important secrets for perfect roast potatoes.


    Step 4: Prepare the Roasting Tray

    Preheat the oven to:

    220ยฐC (425ยฐF)

    or

    200ยฐC fan oven (400ยฐF)

    Place the roasting tray inside the oven while it heats.

    A hot tray helps create an immediate crispy crust when the potatoes are added.


    Step 5: Season the Potatoes

    Place the roughened potatoes into a large bowl.

    Add:

    • Olive oil
    • Melted butter
    • Salt
    • Black pepper
    • Garlic powder
    • Onion powder
    • Smoked paprika

    Toss gently until every potato piece is coated.


    Step 6: Add Herbs and Garlic

    Carefully remove the hot roasting tray from the oven.

    Spread the potatoes evenly across the tray.

    Do not overcrowd the pan. Leave space between pieces so they roast instead of steaming.

    Add:

    • Crushed garlic cloves
    • Rosemary
    • Thyme

    The herbs and garlic will infuse the oil with incredible flavor as the potatoes roast.


    Step 7: Roast the Potatoes

    Place the tray into the oven.

    Roast for:

    45โ€“60 minutes

    Turn the potatoes every 20 minutes to ensure even browning.

    They are ready when:

    • The outside is deep golden brown.
    • The edges are crispy.
    • The center is soft and fluffy.

    For extra crunch, increase the oven temperature slightly during the final 5 minutes.


    Step 8: Finish and Serve

    Remove the potatoes from the oven.

    Discard the herb stems if desired.

    Sprinkle with:

    • Fresh parsley
    • Flaky sea salt
    • Parmesan cheese
    • Lemon zest

    Serve immediately while hot and crispy.


    Serving Suggestions

    Perfect roast potatoes pair beautifully with:

    Meat Dishes

    • Roast chicken
    • Beef roast
    • Lamb chops
    • Grilled steak
    • Pork tenderloin

    Vegetarian Meals

    • Roasted vegetables
    • Mushroom gravy
    • Lentil dishes
    • Vegetable casseroles

    Sauces

    Serve with:

    • Garlic aioli
    • Herb butter
    • Gravy
    • Sour cream
    • Cheese sauce
    • Spicy mayonnaise

    Make-Ahead Instructions

    For holidays and large gatherings:

    1. Parboil the potatoes up to one day ahead.
    2. Drain and rough them up.
    3. Store covered in the refrigerator.
    4. Roast when ready to serve.

    You can also roast them halfway, then finish them in a hot oven just before serving.


    Storage

    Store leftover roast potatoes in an airtight container.

    Refrigerate for up to 3 days.

    Reheat in:

    • Oven: 200ยฐC (400ยฐF) for 10โ€“15 minutes
    • Air fryer: 5โ€“8 minutes

    Avoid microwaving if you want to keep the crispy texture.


    Freezing

    Roast potatoes can be frozen.

    Allow them to cool completely.

    Place them on a tray and freeze separately.

    Transfer to a freezer bag.

    Freeze for up to 3 months.

    Reheat directly from frozen in a hot oven until crispy.


    Delicious Variations

    Garlic Parmesan Roast Potatoes

    Add:

    • ยฝ cup grated Parmesan
    • Extra minced garlic
    • Fresh parsley

    Sprinkle Parmesan during the final 10 minutes of roasting.


    Spicy Roast Potatoes

    Add:

    • 1 teaspoon chili flakes
    • 1 teaspoon smoked paprika
    • ยฝ teaspoon cayenne pepper

    Mediterranean Roast Potatoes

    Add:

    • Lemon juice
    • Oregano
    • Feta cheese
    • Kalamata olives

    Herb Butter Roast Potatoes

    Replace some oil with herb butter made from:

    • Butter
    • Garlic
    • Parsley
    • Rosemary

    Honey Mustard Roast Potatoes

    Mix:

    • 2 tablespoons honey
    • 2 tablespoons mustard
    • Olive oil

    Coat potatoes before roasting.


    Tips for Perfect Roast Potatoes

    • Always start potatoes in cold water for even cooking.
    • Do not skip parboiling; it creates the fluffy interior.
    • Shake potatoes after draining to create crispy edges.
    • Use enough oil to coat every surface.
    • Roast at high temperature for maximum crunch.
    • Avoid overcrowding the tray.
    • Turn potatoes during cooking for even browning.
    • Add fresh herbs during roasting for better flavor.
    • Serve immediately for the crispiest texture.

    Approximate Nutrition (Per Serving, Based on 8 Servings)

    • Calories: 280
    • Carbohydrates: 42 g
    • Protein: 5 g
    • Fat: 10 g
    • Saturated Fat: 3 g
    • Fibre: 5 g
    • Sugar: 2 g
    • Sodium: 420 mg

    Nutrition values are approximate and depend on the type and amount of oil used.


    Conclusion

    The best roast potatoes are all about technique: choosing the right potatoes, parboiling them properly, creating rough edges, and roasting them at high heat. The result is a side dish with perfectly crispy golden surfaces and soft, fluffy centers that everyone loves. With simple ingredients like olive oil, garlic, herbs, and seasoning, this recipe creates a restaurant-quality dish that is perfect for everyday meals, family gatherings, and festive celebrations. Once you master this method, roast potatoes will become a favorite recipe you return to again and again.

  • Healthy Pancakes Recipe

    Healthy Pancakes Recipe

    Healthy pancakes are a nutritious twist on the traditional breakfast favorite, offering the same fluffy texture and comforting flavor while using wholesome ingredients that provide more fiber, protein, vitamins, and minerals. Instead of relying on refined flour and large amounts of sugar, this recipe combines whole grains, oats, Greek yogurt, and natural sweeteners to create pancakes that are both satisfying and nourishing. They are perfect for busy weekday mornings, relaxed weekend brunches, or even as a healthy snack after exercise.

    These pancakes are light, tender, and naturally sweet, making them suitable for both children and adults. They can be customized with fruits, nuts, seeds, or spices, allowing you to create endless variations while maintaining a balanced nutritional profile. This recipe yields approximately 10โ€“12 medium pancakes, serving four people.


    Why You’ll Love This Recipe

    • Made with wholesome ingredients
    • High in protein and fiber
    • Naturally sweetened
    • Soft, fluffy, and delicious
    • Easy to prepare in under 30 minutes
    • Great for meal prep
    • Freezer-friendly
    • Customizable with your favorite toppings

    Ingredients

    Dry Ingredients

    • 150 g (1ยฝ cups) rolled oats or oat flour
    • 100 g (ยพ cup) whole wheat flour
    • 2 teaspoons baking powder
    • ยฝ teaspoon baking soda
    • ยฝ teaspoon ground cinnamon
    • ยผ teaspoon salt

    Wet Ingredients

    • 2 large eggs
    • 240 ml (1 cup) low-fat milk or unsweetened almond milk
    • 120 g (ยฝ cup) plain Greek yogurt
    • 2 tablespoons honey or pure maple syrup
    • 1 teaspoon vanilla extract
    • 1 tablespoon olive oil or melted coconut oil

    Optional Add-Ins

    • 1 mashed ripe banana
    • 50 g fresh blueberries
    • 50 g chopped strawberries
    • 2 tablespoons chia seeds
    • 2 tablespoons ground flaxseed
    • 2 tablespoons chopped walnuts
    • 2 tablespoons dark chocolate chips (optional)

    Healthy Toppings

    • Fresh berries
    • Sliced banana
    • Greek yogurt
    • Chopped almonds
    • Peanut butter
    • Almond butter
    • Sugar-free maple syrup
    • Honey
    • Pumpkin seeds
    • Toasted coconut
    • Fresh mint leaves

    Equipment

    • Large mixing bowl
    • Medium mixing bowl
    • Whisk
    • Measuring cups and spoons
    • Non-stick frying pan or griddle
    • Spatula
    • Ladle or measuring cup

    Preparation Time

    • Preparation: 10 minutes
    • Cooking: 15โ€“20 minutes
    • Total Time: About 30 minutes

    Step 1: Prepare the Dry Ingredients

    In a large mixing bowl, combine:

    • Rolled oats or oat flour
    • Whole wheat flour
    • Baking powder
    • Baking soda
    • Cinnamon
    • Salt

    Whisk thoroughly to distribute the ingredients evenly.

    This helps ensure the pancakes rise evenly during cooking.


    Step 2: Mix the Wet Ingredients

    In another bowl, whisk together:

    • Eggs
    • Milk
    • Greek yogurt
    • Honey
    • Vanilla extract
    • Olive oil

    Continue whisking until smooth.

    If using mashed banana, stir it into the wet mixture now.


    Step 3: Make the Batter

    Pour the wet ingredients into the bowl of dry ingredients.

    Mix gently with a whisk or spatula until just combined.

    The batter should be slightly thick with a few small lumps.

    Avoid overmixing, as this can make the pancakes dense rather than fluffy.

    If adding blueberries, chopped strawberries, flaxseed, chia seeds, walnuts, or chocolate chips, gently fold them into the batter.


    Step 4: Rest the Batter

    Allow the batter to rest for 5โ€“10 minutes.

    This gives the oats and flour time to absorb the liquid, resulting in softer pancakes with a better texture.

    If the batter becomes too thick, stir in a tablespoon or two of milk to loosen it slightly.


    Step 5: Heat the Pan

    Place a non-stick frying pan or griddle over medium heat.

    Lightly grease it with a small amount of oil or butter.

    The pan is ready when a drop of water sizzles gently on the surface.

    Avoid overheating, as very high heat can brown the outside before the inside is fully cooked.


    Step 6: Cook the Pancakes

    Pour about 60 ml (ยผ cup) of batter onto the hot pan for each pancake.

    Cook for about 2โ€“3 minutes, until bubbles appear on the surface and the edges begin to set.

    Flip carefully using a spatula.

    Cook the second side for another 1โ€“2 minutes, or until golden brown and cooked through.

    Transfer the finished pancakes to a plate and keep warm while cooking the remaining batter.


    Step 7: Serve

    Stack the warm pancakes on serving plates.

    Top with your favorite healthy toppings such as fresh berries, sliced bananas, Greek yogurt, chopped nuts, or a drizzle of honey or maple syrup.

    Serve immediately while warm.


    Serving Suggestions

    Healthy pancakes pair wonderfully with:

    • Fresh fruit salad
    • Greek yogurt
    • Cottage cheese
    • Scrambled eggs
    • Turkey bacon
    • Smoothies
    • Fresh orange juice
    • Herbal tea
    • Coffee

    For a balanced breakfast, combine pancakes with a source of protein and fresh fruit.


    Storage

    Allow the pancakes to cool completely.

    Store them in an airtight container in the refrigerator for up to 4 days.

    Separate each pancake with parchment paper to prevent sticking.


    Freezing

    Arrange the cooled pancakes in a single layer on a baking tray and freeze until firm.

    Transfer them to a freezer-safe bag or container.

    Freeze for up to 3 months.

    Reheat in a toaster, microwave, or oven until warmed through.


    Delicious Variations

    Banana Oat Pancakes

    Replace the honey with one extra mashed banana for natural sweetness and moisture.


    Blueberry Pancakes

    Fold fresh or frozen blueberries into the batter for juicy bursts of flavor.


    Apple Cinnamon Pancakes

    Add one grated apple and an extra teaspoon of cinnamon for a cozy autumn-inspired breakfast.


    Chocolate Protein Pancakes

    Mix one scoop of chocolate protein powder into the dry ingredients and adjust the milk slightly if needed.


    Pumpkin Spice Pancakes

    Add 120 g (ยฝ cup) pumpkin purรฉe and 1 teaspoon pumpkin pie spice for a seasonal variation.


    Lemon Poppy Seed Pancakes

    Add 1 tablespoon poppy seeds and the zest of one lemon to brighten the flavor.


    Nutty Pancakes

    Fold chopped pecans, walnuts, or almonds into the batter for extra crunch and healthy fats.


    Tips for Perfect Healthy Pancakes

    • Measure ingredients accurately for consistent results.
    • Do not overmix the batter; a few lumps are perfectly fine.
    • Let the batter rest before cooking to improve texture.
    • Cook over medium heat for even browning.
    • Flip the pancakes only once to keep them light and fluffy.
    • Use ripe bananas for added sweetness if reducing honey or syrup.
    • Keep cooked pancakes warm in a low oven while finishing the batch.

    Approximate Nutrition (Per Serving, Based on 4 Servings)

    • Calories: 290
    • Protein: 13 g
    • Fat: 8 g
    • Saturated Fat: 2 g
    • Carbohydrates: 41 g
    • Dietary Fibre: 6 g
    • Sugar: 9 g
    • Sodium: 280 mg
    • Calcium: 18% of Daily Value
    • Iron: 15% of Daily Value

    Nutrition values are approximate and may vary depending on the ingredients and toppings used.


    Conclusion

    Healthy Pancakes are a wholesome and satisfying breakfast that proves nutritious eating can also be delicious. Made with oats, whole wheat flour, Greek yogurt, and naturally sweet ingredients, these pancakes provide lasting energy and a balanced combination of protein, fiber, and complex carbohydrates. They are simple to prepare, freezer-friendly, and endlessly customizable with fruits, nuts, seeds, or spices to suit your taste and dietary preferences. Whether enjoyed as a quick weekday breakfast, a leisurely weekend brunch, or a nourishing snack, these fluffy pancakes are a versatile recipe that supports a healthy lifestyle without sacrificing flavor.

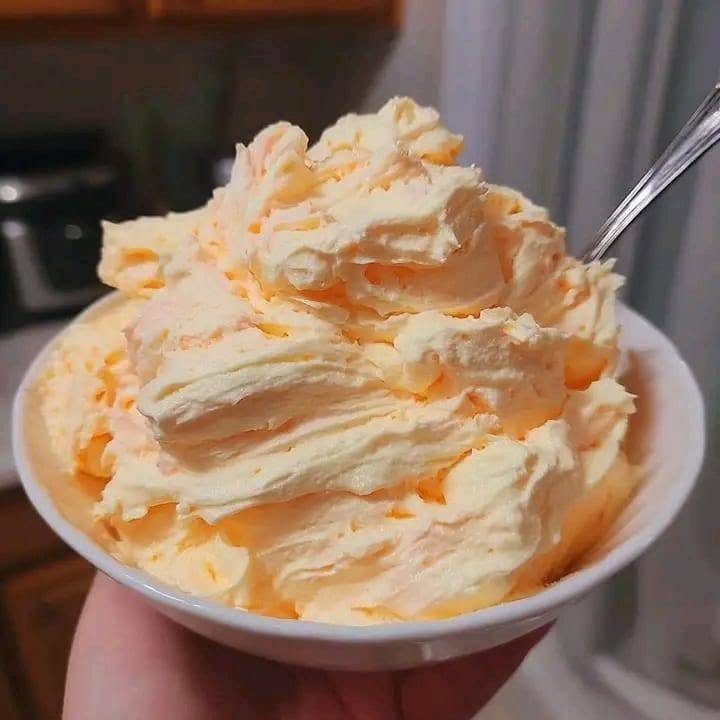
  • Orange Fluff Keto Dessert

    Orange Fluff Keto Dessert

    Orange Fluff Keto Dessert

    Orange Fluff Keto Dessert is a light, creamy, and refreshing low-carb treat that delivers bright citrus flavor without the added sugar found in traditional orange desserts. Made with cream cheese, whipped cream, sugar-free orange gelatin, and a few keto-friendly ingredients, this dessert has a smooth mousse-like texture that melts in your mouth. It is perfect for anyone following a ketogenic or low-carb lifestyle while still satisfying a craving for something sweet.

    Unlike classic orange fluff recipes that often contain marshmallows, instant pudding, or canned fruit in syrup, this keto version keeps carbohydrates low by using sugar-free alternatives and fresh ingredients. The result is a dessert that is rich, fluffy, and packed with refreshing orange flavor. It is ideal for family dinners, summer gatherings, holiday meals, or meal prep because it can be prepared several hours in advance.

    This recipe serves 8โ€“10 people and requires no baking, making it a convenient dessert for beginners and experienced home cooks alike.


    Ingredients

    Cream Base

    • 225 g (8 oz) full-fat cream cheese, softened
    • 250 ml (1 cup) heavy whipping cream
    • 120 ml (ยฝ cup) sour cream
    • 60 g powdered keto sweetener (erythritol or monk fruit blend)
    • 1 teaspoon vanilla extract

    Orange Flavor

    • 1 packet (0.3 oz or 8.5 g) sugar-free orange gelatin
    • 120 ml (ยฝ cup) boiling water
    • 1 tablespoon fresh orange zest
    • ยฝ teaspoon orange extract (optional, for stronger flavor)

    Optional Mix-Ins

    • 50 g chopped pecans
    • 50 g chopped walnuts
    • 30 g unsweetened shredded coconut
    • 30 g chopped sugar-free white chocolate
    • 2 tablespoons chia seeds

    Garnish

    • Whipped cream
    • Orange zest
    • Toasted coconut flakes
    • Chopped pistachios
    • Mint leaves

    Equipment

    • Large mixing bowl
    • Electric hand mixer or stand mixer
    • Measuring cups and spoons
    • Rubber spatula
    • Small heatproof bowl
    • Whisk
    • Serving bowl or individual dessert glasses
    • Refrigerator

    Preparation Time

    • Preparation: 20 minutes
    • Chilling: 3โ€“4 hours
    • Total Time: About 4 hours

    Step 1: Dissolve the Gelatin

    Pour the boiling water into a small bowl.

    Add the sugar-free orange gelatin.

    Whisk until completely dissolved.

    Allow it to cool for 10โ€“15 minutes. It should remain liquid but no longer be hot.


    Step 2: Beat the Cream Cheese

    Place the softened cream cheese into a large mixing bowl.

    Beat for about 2 minutes until smooth and creamy.

    Add the powdered keto sweetener and continue beating until fully combined.

    Mix in the vanilla extract, sour cream, orange zest, and orange extract if using.

    Beat until the mixture is silky and free of lumps.


    Step 3: Add the Gelatin

    Slowly pour the cooled orange gelatin into the cream cheese mixture while mixing on low speed.

    Continue mixing until fully incorporated.

    The mixture should have a smooth, pale orange color.


    Step 4: Whip the Cream

    In a separate chilled bowl, whip the heavy cream until stiff peaks form.

    Properly whipped cream gives the dessert its signature fluffy texture.

    Avoid overwhipping, which can make the cream grainy.


    Step 5: Fold Everything Together

    Using a rubber spatula, gently fold the whipped cream into the orange mixture.

    Work slowly to keep as much air in the mixture as possible.

    If using chopped nuts, coconut, sugar-free white chocolate, or chia seeds, fold them in at this stage.

    The finished mixture should be light, airy, and evenly blended.


    Step 6: Chill

    Transfer the fluff into a large serving bowl or divide it among individual dessert glasses.

    Cover with plastic wrap.

    Refrigerate for at least 3โ€“4 hours, or overnight for the best texture.

    As it chills, the gelatin helps the dessert become light, stable, and mousse-like.


    Step 7: Garnish and Serve

    Before serving, decorate with whipped cream, grated orange zest, toasted coconut, chopped pistachios, or fresh mint leaves.

    Serve chilled for the freshest flavor and creamiest texture.


    Serving Suggestions

    This keto dessert pairs well with:

    • Freshly brewed coffee
    • Unsweetened iced tea
    • Herbal tea
    • Sparkling water with citrus
    • Keto butter cookies
    • Sugar-free chocolate shavings

    For an elegant presentation, layer the fluff in dessert glasses and top each serving with a small mint sprig and a sprinkle of orange zest.


    Storage

    Store the dessert covered in the refrigerator for up to 4 days.

    Keep it chilled until ready to serve, as the whipped cream and cream cheese soften if left at room temperature for long periods.


    Freezing

    Although it can be frozen for up to one month, freezing may slightly alter the texture after thawing. For the best creamy consistency, enjoy it fresh from the refrigerator.


    Delicious Variations

    Chocolate Orange Keto Fluff

    Fold in sugar-free dark chocolate chips or drizzle melted sugar-free chocolate over the top.


    Coconut Orange Fluff

    Add extra unsweetened shredded coconut and garnish with toasted coconut flakes.


    Berry Orange Fluff

    Top with a few fresh raspberries or strawberries for a burst of color and flavor while keeping carbohydrates relatively low.


    Nut Lover’s Version

    Mix chopped pecans, walnuts, almonds, and pistachios into the dessert for added crunch.


    Cheesecake Orange Fluff

    Increase the cream cheese to 340 g (12 oz) for a richer, cheesecake-like texture.


    Citrus Blend

    Replace part of the orange zest with lemon or lime zest for a brighter citrus profile.


    Pumpkin Spice Orange Fluff

    Add a pinch of pumpkin pie spice or ground cinnamon for a warm seasonal twist.


    Tips for Success

    • Use softened cream cheese to ensure a perfectly smooth mixture.
    • Let the gelatin cool slightly before adding it to avoid melting the cream cheese mixture.
    • Chill the mixing bowl before whipping the cream for faster, more stable peaks.
    • Fold the whipped cream gently to maintain a light, fluffy texture.
    • Taste the mixture before chilling and adjust the sweetness if needed using additional powdered keto sweetener.
    • Use fresh orange zest rather than juice to maximize citrus flavor while keeping carbohydrates low.
    • Refrigerate overnight if possible, as the flavor improves after resting.

    Approximate Nutrition (Per Serving, Based on 10 Servings)

    • Calories: 230
    • Fat: 22 g
    • Protein: 4 g
    • Total Carbohydrates: 6 g
    • Dietary Fibre: 1 g
    • Net Carbohydrates: 5 g
    • Sugar: 2 g
    • Saturated Fat: 13 g
    • Cholesterol: 70 mg
    • Sodium: 120 mg

    Nutrition values are approximate and may vary depending on the brands of keto-friendly ingredients used.


    Conclusion

    Orange Fluff Keto Dessert is a creamy, refreshing, and satisfying low-carb dessert that proves you can enjoy bright citrus flavor while staying within a ketogenic lifestyle. Its combination of fluffy whipped cream, smooth cream cheese, sugar-free orange gelatin, and fresh orange zest creates a dessert that feels indulgent without the excess sugar. Easy to prepare and ideal for making ahead, it is perfect for family meals, celebrations, summer gatherings, or everyday treats. With countless variationsโ€”from chocolate orange to coconut or nut-filled versionsโ€”this versatile recipe can easily become a favorite in any keto recipe collection.

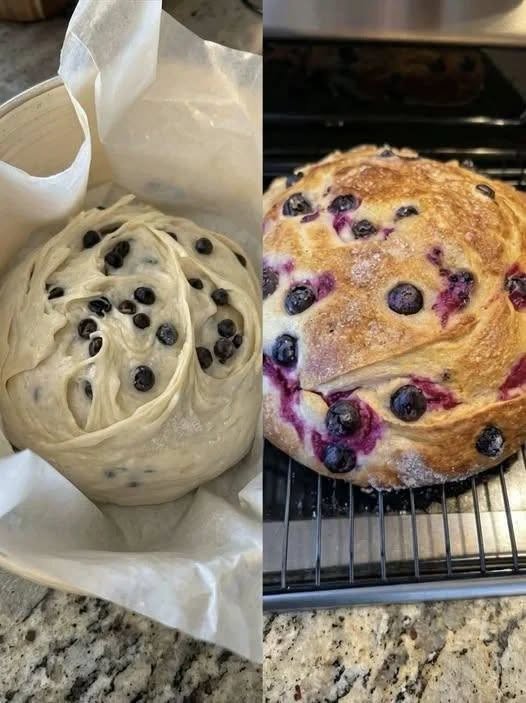
  • Blueberry Cream Cheese Loaf Recipe

    Blueberry Cream Cheese Loaf Recipe

    If you love moist quick breads bursting with juicy blueberries and rich cream cheese, this Blueberry Cream Cheese Loaf is the perfect recipe to add to your baking collection. It combines the sweetness of fresh blueberries with a creamy cheesecake-like layer, creating a loaf that’s soft, flavorful, and ideal for breakfast, brunch, dessert, or an afternoon snack with coffee or tea. The cream cheese filling adds richness without overwhelming the light, fruity flavor of the blueberries.

    Whether you’re an experienced baker or a beginner, this recipe is straightforward and rewarding. The result is a bakery-style loaf with a tender crumb, beautiful swirls of cream cheese, and pockets of sweet blueberries in every bite.

    Why You’ll Love This Recipe

    There are many reasons why this blueberry cream cheese loaf has become a favorite among home bakers:

    • Moist and tender texture
    • Creamy cheesecake-inspired center
    • Loaded with juicy blueberries
    • Perfect for breakfast, brunch, or dessert
    • Easy to prepare with basic pantry ingredients
    • Freezes well for later
    • Delicious warm or chilled

    The combination of tangy cream cheese and naturally sweet blueberries creates a balanced flavor that tastes indulgent without being overly sweet.

    Ingredients

    For the Loaf

    • 2 cups all-purpose flour
    • 2 teaspoons baking powder
    • ยฝ teaspoon salt
    • ยฝ cup unsalted butter, softened
    • ยพ cup granulated sugar
    • 2 large eggs
    • 1 teaspoon vanilla extract
    • ยฝ cup milk
    • 1 tablespoon lemon zest (optional)
    • 1ยฝ cups fresh or frozen blueberries
    • 1 tablespoon flour (for coating blueberries)

    For the Cream Cheese Filling

    • 8 ounces (225 g) cream cheese, softened
    • ยผ cup granulated sugar
    • 1 egg yolk
    • 1 teaspoon vanilla extract

    Optional Topping

    • 2 tablespoons coarse sugar
    • Extra blueberries
    • Sliced almonds
    • Powdered sugar for dusting

    Equipment Needed

    • 9ร—5-inch loaf pan
    • Mixing bowls
    • Electric mixer or whisk
    • Rubber spatula
    • Cooling rack
    • Measuring cups and spoons

    Step 1: Prepare the Oven

    Preheat your oven to 350ยฐF (175ยฐC).

    Grease a 9ร—5-inch loaf pan with butter or nonstick spray. You may also line it with parchment paper for easier removal.

    Step 2: Prepare the Blueberries

    Wash and dry the blueberries thoroughly if using fresh berries.

    Toss them with one tablespoon of flour. This simple trick helps prevent the berries from sinking to the bottom during baking.

    Step 3: Mix the Dry Ingredients

    In a medium bowl, combine:

    • Flour
    • Baking powder
    • Salt

    Whisk everything together until evenly combined.

    Set aside.

    Step 4: Make the Batter

    In a large bowl, beat together:

    • Butter
    • Sugar

    Mix until light and fluffy, about 3โ€“4 minutes.

    Add the eggs one at a time, beating after each addition.

    Mix in:

    • Vanilla extract
    • Lemon zest

    Step 5: Combine Wet and Dry Ingredients

    Gradually add the flour mixture in three additions, alternating with the milk.

    Mix gently until just combined.

    Avoid overmixing, as this can make the loaf dense.

    Fold in the floured blueberries carefully using a spatula.

    Step 6: Prepare the Cream Cheese Filling

    In another bowl, combine:

    • Softened cream cheese
    • Sugar
    • Egg yolk
    • Vanilla

    Beat until smooth and creamy.

    Step 7: Assemble the Loaf

    Spread half of the loaf batter into the prepared pan.

    Spread the cream cheese mixture evenly over the batter.

    Top with the remaining loaf batter.

    Use a butter knife to gently swirl the cream cheese into the batter if desired.

    Sprinkle coarse sugar or almonds over the top if using.

    Step 8: Bake

    Bake for 55โ€“70 minutes, or until a toothpick inserted into the cake portion comes out mostly clean. A little cream cheese on the tester is normal.

    If the loaf begins browning too quickly, loosely cover it with aluminum foil during the final 20 minutes.

    Step 9: Cool

    Allow the loaf to cool in the pan for 15 minutes.

    Transfer it to a wire rack to cool completely.

    Cooling completely helps the cream cheese layer set properly.

    Optional Glaze

    For extra sweetness, drizzle with a simple glaze.

    Ingredients

    • 1 cup powdered sugar
    • 2 tablespoons milk
    • ยฝ teaspoon vanilla

    Mix until smooth and drizzle over the cooled loaf.

    Tips for Success

    • Use room-temperature butter, eggs, and cream cheese.
    • Coat blueberries with flour before folding them into the batter.
    • Do not overmix the batter.
    • Fresh blueberries hold their shape best, but frozen blueberries work well tooโ€”use them straight from the freezer.
    • Allow the loaf to cool before slicing for clean, neat pieces.

    Variations

    Lemon Blueberry Cream Cheese Loaf

    Increase the lemon zest to two tablespoons and add one tablespoon of fresh lemon juice for a bright citrus flavor.

    Cinnamon Swirl

    Sprinkle cinnamon sugar between the batter and cream cheese layers.

    Mixed Berry Loaf

    Replace some blueberries with raspberries or blackberries.

    Streusel Topping

    Top with a crumb mixture made from flour, butter, brown sugar, and cinnamon before baking.

    Nutty Version

    Fold chopped pecans or walnuts into the batter for added crunch.

    Storage

    Store the loaf in an airtight container in the refrigerator for up to 5 days because of the cream cheese filling.

    Bring slices to room temperature or warm them briefly before serving.

    Freezing Instructions

    Wrap the completely cooled loaf tightly in plastic wrap, then aluminum foil.

    Freeze for up to 3 months.

    Thaw overnight in the refrigerator before serving.

    Individual slices can also be frozen for quick breakfasts or snacks.

    Serving Suggestions

    This loaf pairs wonderfully with:

    • Hot coffee
    • Earl Grey or green tea
    • Fresh fruit
    • Vanilla yogurt
    • Whipped cream
    • A scoop of vanilla ice cream for dessert

    It also makes a thoughtful homemade gift during holidays or special occasions.

    Nutritional Information (Approximate per Slice)

    • Calories: 320
    • Protein: 6 g
    • Fat: 15 g
    • Carbohydrates: 42 g
    • Sugar: 23 g
    • Fiber: 2 g
    • Sodium: 180 mg

    Values may vary depending on ingredient brands and portion size.

    Common Mistakes to Avoid

    • Using cold cream cheese: It can create lumps in the filling.
    • Overmixing the batter: This leads to a tougher loaf.
    • Skipping the flour coating on blueberries: The berries may sink.
    • Removing the loaf too early: Check for doneness with a toothpick in the cake portion.
    • Slicing while hot: The cream cheese layer needs time to set.

    Frequently Asked Questions

    Can I use frozen blueberries?

    Yes. Add them directly from the freezer without thawing to prevent excess moisture and color bleeding.

    Can I make this loaf ahead of time?

    Absolutely. In fact, the flavors often improve after chilling overnight.

    Can I use low-fat cream cheese?

    Yes, though full-fat cream cheese provides the richest flavor and creamiest texture.

    How do I know when it’s done?

    The top should be golden brown, and a toothpick inserted into the cake portion should come out with only a few moist crumbs.

    Can I make muffins instead?

    Yes. Divide the batter among muffin cups, add a small spoonful of cream cheese filling to each, and bake at 350ยฐF (175ยฐC) for about 20โ€“25 minutes.

    Final Thoughts

    Blueberry Cream Cheese Loaf is the perfect blend of a classic quick bread and creamy cheesecake. The soft vanilla-scented loaf, rich cream cheese filling, and bursts of juicy blueberries create an irresistible treat that’s suitable for breakfast, brunch, dessert, or a snack. It’s simple enough for everyday baking yet elegant enough to serve to guests. With proper storage, it stays moist for days and freezes beautifully, making it a reliable recipe you’ll want to bake again and again. Whether enjoyed plain, glazed, or paired with a warm beverage, this loaf is sure to become a family favorite.