 Cooking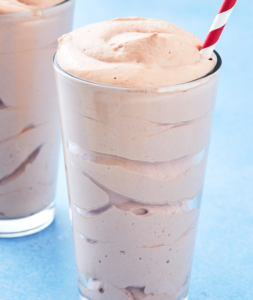
If you love thick, creamy chocolate desserts, this homemade Chocolate Frosty is a simple treat worth making. It has the rich creaminess of a milkshake while being thick enough to enjoy with a spoon. The chocolate flavor is smooth and balanced rather than overwhelmingly intense, making it a great dessert for both kids and adults.
The secret to a good homemade Frosty is not simply combining milk, cream, cocoa, and sugar. The freezing process is just as important as the ingredients. When the mixture freezes too quickly or remains undisturbed, large ice crystals can develop and give the dessert an icy texture. By chilling the mixture first, freezing it gradually, stirring it during the freezing stage, and blending it before serving, you can create a much smoother consistency.
This recipe is designed to give you that familiar thick and creamy Frosty-style texture at home without requiring a complicated ice-cream machine. It is especially delicious on a warm afternoon, after dinner, or whenever you want a homemade chocolate dessert with a soft, spoonable consistency.
What Is a Chocolate Frosty?
A Chocolate Frosty has a texture that sits between a traditional milkshake and soft-serve ice cream. It is thicker than most milkshakes but softer and less firmly frozen than regular ice cream. This unique consistency is what makes the dessert so recognizable.
Unlike a conventional ice cream recipe, this homemade version does not need to be completely frozen solid. Instead, the mixture is partially frozen and then blended until it becomes thick, smooth, and creamy. The result is a dessert that can be eaten immediately rather than waiting for a hard-frozen mixture to soften.
The combination of whole milk and heavy cream provides richness, while cocoa powder gives the dessert its chocolate flavor. Sugar contributes sweetness while also helping keep the frozen mixture from becoming excessively hard. A little vanilla extract rounds everything out and gives the chocolate a deeper flavor.
Why You’ll Love This Chocolate Frosty
There are several reasons this homemade Chocolate Frosty makes such a satisfying dessert. First, it uses simple ingredients that are easy to find. You do not need an elaborate list of specialty ingredients to create a creamy frozen chocolate treat.
The texture is another major advantage. Proper chilling, controlled freezing, and a final blending step help produce a smooth consistency with fewer noticeable ice crystals. The finished Frosty should be thick enough to hold its shape briefly on a spoon while still being soft enough to scoop and enjoy immediately.
The recipe is also flexible. You can adjust the final consistency according to your preference. If it becomes too thick, a small amount of milk can loosen it. If it is too soft, additional freezing time can help firm it up.
Ingredients for Chocolate Frosty
Whole Milk
Use 2 cups of whole milk as the liquid foundation of the recipe. Milk provides moisture and contributes to the overall structure of the frozen dessert.
Heavy Cream
You will need 1 cup of heavy cream. The cream adds richness and helps create the smooth, creamy mouthfeel associated with frozen desserts.
Unsweetened Cocoa Powder
Add ¼ cup of unsweetened cocoa powder for the chocolate flavor. Cocoa also contributes a little body to the mixture.
Granulated Sugar
Use ½ to ¾ cup of sugar, depending on your preferred level of sweetness. Sugar does more than sweeten the dessert; it also helps keep the mixture softer when frozen.
Vanilla Extract
One teaspoon of vanilla extract helps round out the chocolate flavor and adds subtle depth to the finished dessert.
Optional Thickener
For a thicker homemade Frosty, you can use either a cornstarch slurry or milk powder. This is optional and can be useful when you want additional body and a slightly more stable texture.
How to Make Chocolate Frosty
Step 1: Combine the Ingredients
Begin by adding the whole milk, heavy cream, unsweetened cocoa powder, sugar, and vanilla extract to a large mixing bowl. Whisk the ingredients thoroughly until the cocoa powder is fully incorporated and the sugar is well distributed.
Take your time during this step. Any remaining dry cocoa pockets can create an uneven chocolate flavor or small lumps in the finished dessert. The mixture should look smooth and evenly blended before moving to the next stage.
Step 2: Add an Optional Thickener
If you want extra body, prepare a small cornstarch slurry and add it to the mixture. Warm the mixture gently while stirring until it becomes slightly thicker.
Do not allow the mixture to boil aggressively. Once it has thickened slightly, remove it from the heat and allow it to cool completely.
If you prefer a simpler preparation, you can skip this step and proceed directly to chilling.
Step 3: Chill the Mixture
Cover the mixture and place it in the refrigerator for approximately 2 to 4 hours.
Pre-chilling is useful because starting with a cold mixture makes the freezing stage more effective. It also gives the cocoa and vanilla time to blend with the dairy, resulting in a more balanced flavor.
For the best texture, make sure the mixture is thoroughly chilled before placing it in the freezer.
Step 4: Begin Freezing
Pour the chilled mixture into a shallow freezer-safe container. A shallow container allows the mixture to freeze more evenly than a deep container.
Place it in the freezer for about 2 to 3 hours. Every 30 minutes, remove the container and stir the partially frozen mixture thoroughly.
This repeated stirring breaks up developing ice crystals and helps create a smoother final texture. Continue until the mixture is noticeably frozen but not completely solid.
Step 5: Blend Until Smooth
Transfer the partially frozen mixture to a blender or suitable food processor. Blend until the dessert becomes smooth, thick, and creamy.
Avoid blending longer than necessary. The goal is to break down the ice crystals and create the characteristic thick consistency without turning the mixture too liquid.
At this stage, check the texture. It should be thick and spoonable while remaining soft enough to serve.
Step 6: Adjust the Consistency
If your Chocolate Frosty is too thick, blend in a small splash of milk until you reach the desired consistency.
If it is too thin, return it to the freezer for additional time. Check it periodically until it reaches a thick, creamy texture.
Small adjustments are normal because freezing conditions can vary between freezers and containers.
Step 7: Serve Immediately
Once the Frosty reaches the texture you want, serve it immediately. Chilled serving glasses or cups can help the dessert maintain its consistency for a little longer.
For a classic presentation, serve it simply with a spoon. You can also add your favorite toppings if desired.
The Secret to a Smooth Frosty Texture
The biggest challenge when making frozen desserts at home is controlling ice crystals. Large ice crystals are responsible for the icy texture that can make homemade frozen desserts feel rough instead of creamy.
There are several ways this recipe works against that problem. The fat from heavy cream contributes richness and helps create a smoother mouthfeel. Sugar affects the freezing point and prevents the mixture from becoming excessively hard. Pre-chilling helps the mixture freeze efficiently, while frequent stirring disrupts the formation of large ice crystals.
Finally, blending the partially frozen mixture creates the smooth consistency that makes this dessert so enjoyable.
How Thick Should a Chocolate Frosty Be?
The ideal Frosty should be noticeably thicker than a regular chocolate milkshake. It should have enough body that you can eat it with a spoon, but it should not be frozen as hard as traditional ice cream.
When you scoop it, the mixture should look creamy and dense rather than liquid. It should slowly soften as it sits at room temperature.
If your Frosty is flowing like a milkshake, it needs more freezing time. If it is completely solid, allow it to soften slightly and blend it again with a small amount of milk.
Quick Blender Chocolate Frosty
For a faster version, you can combine milk, heavy cream, cocoa powder, sugar, and ice in a blender. Blend until the mixture becomes thick and smooth.
This shortcut is convenient when you want a quick frozen chocolate drink-style dessert. However, the controlled freezing method generally gives you more control over the texture and produces a thicker, more Frosty-like consistency.
Common Chocolate Frosty Problems
Why Is My Frosty Icy?
An icy Frosty usually develops when large ice crystals form during freezing. This can happen when the mixture freezes without being stirred.
To improve the texture, stir the mixture approximately every 30 minutes during freezing and blend it thoroughly before serving.
Why Is My Frosty Too Thin?
A thin Frosty usually needs more freezing time. Return it to the freezer and allow it to firm up before blending again.
Avoid adding too much liquid during the texture-adjustment stage because even a small amount of milk can noticeably change the consistency.
Why Is My Frosty Too Thick?
If the dessert becomes too firm, allow it to sit briefly at room temperature. You can also blend in a small amount of milk until the desired consistency is reached.
Why Doesn’t It Taste Chocolatey Enough?
If you prefer a stronger chocolate flavor, slightly increasing the cocoa powder can make the chocolate taste more pronounced. Remember that the goal of a classic-style Frosty is generally a smooth, mellow chocolate flavor rather than an intensely dark chocolate dessert.
Chocolate Frosty Variations
High-Protein Chocolate Frosty
For a protein-focused variation, add your preferred protein powder. You may need to adjust the liquid slightly depending on the protein powder you use because some varieties absorb more moisture than others.
Keto Chocolate Frosty
For a lower-carbohydrate version, replace the granulated sugar with a suitable sugar alternative. The amount needed can vary because different sweeteners have different levels of sweetness and effects on freezing.
Double Chocolate Frosty
For a richer chocolate dessert, add melted chocolate to the base before chilling. Allow the chocolate mixture to cool appropriately before continuing with the freezing process.
Mocha Frosty
Add a small amount of cooled espresso or strong coffee to create a mocha-inspired version. Coffee can intensify the chocolate flavor while adding a subtle roasted note.
Vanilla Frosty
For a vanilla variation, leave out the cocoa powder and create a creamy vanilla base with milk, cream, sugar, and vanilla extract.
Serving Suggestions
A Chocolate Frosty is delicious on its own, but you can also customize it with toppings. Try chocolate shavings, mini chocolate chips, crushed cookies, chopped nuts, whipped cream, or a light drizzle of chocolate sauce.
For a simple dessert presentation, serve the Frosty in a chilled glass with a spoon. It can also be paired with cookies or brownies for a more indulgent dessert.
Some people enjoy a thick chocolate frozen dessert alongside salty foods because the creamy sweetness provides a contrast to savory flavors.
Storage
This Chocolate Frosty is best enjoyed soon after it reaches the correct consistency. Because homemade frozen desserts do not contain the same commercial stabilizers found in many store-bought products, the texture can change when stored for long periods.
If you have leftovers, place them in a covered freezer-safe container. The mixture may become firm in the freezer. Allow it to soften slightly and blend again before serving.
If necessary, add a small splash of milk while blending to restore the creamy consistency.
Tips for the Best Homemade Chocolate Frosty
Use Cold Ingredients
Starting with properly chilled ingredients helps reduce the amount of time required during the freezing stage and makes texture control easier.
Do Not Skip the Stirring
If using the controlled-freezing method, stirring every 30 minutes is one of the most useful steps for reducing large ice crystals.
Don’t Over-Freeze
The goal is a partially frozen mixture rather than a rock-hard block. Once the mixture is frozen enough to become thick, blend it and serve.
Adjust Slowly
When correcting the consistency, make small adjustments. Add milk a little at a time if the Frosty is too thick, and freeze in short intervals if it is too thin.
Serve Fresh
The texture is at its best immediately after the final blending step, so serve the Frosty as soon as it reaches the desired consistency.
Frequently Asked Questions
Can I Make Chocolate Frosty Without an Ice Cream Maker?
Yes. This recipe uses a container-freezing and blending method, so an ice cream maker is not required.
Can I Use a Different Type of Milk?
Whole milk provides the richest result, but other milk options can be used. Keep in mind that changing the milk can affect the final richness and texture.
Can I Make It Ahead?
You can prepare the mixture ahead of time and keep it chilled before freezing. If storing the finished Frosty in the freezer, allow it to soften slightly and blend before serving.
Can I Make the Frosty Less Sweet?
Yes. The recipe provides a range of ½ to ¾ cup sugar, allowing you to adjust sweetness according to your preference. Keep in mind that sugar also affects freezing, so reducing it significantly can make the dessert freeze harder.
What Makes This Different From a Chocolate Milkshake?
The main difference is texture. A milkshake is generally more fluid and drinkable, while a Frosty-style dessert is thicker, denser, and designed to be eaten with a spoon.
Final Thoughts
This homemade Chocolate Frosty is a delicious example of how simple ingredients and careful preparation can create an impressive frozen dessert. Whole milk provides the liquid foundation, heavy cream brings richness, cocoa powder supplies chocolate flavor, and sugar helps balance sweetness while influencing the freezing process.
The most important part of the recipe is controlling the freezing stage. Chilling the mixture first, freezing it gradually, stirring regularly, and blending the partially frozen mixture all contribute to the smooth and thick consistency that makes a Frosty special.
Whether you enjoy it as an afternoon treat, a simple after-dinner dessert, or a homemade alternative to a chocolate milkshake, this recipe gives you a creamy frozen chocolate dessert that is easy to customize.
Recipe Card
Title: Chocolate Frosty
Description: A thick, creamy homemade chocolate frozen dessert with a smooth, spoonable consistency that falls between a milkshake and soft-serve ice cream.
Preparation Time: 15 minutes
Chilling Time: 2–4 hours
Freezing Time: 2–3 hours
Total Time: Approximately 4–7 hours
Serving: Varies
Ingredients:
2 cups whole milk
1 cup heavy cream
¼ cup unsweetened cocoa powder
½–¾ cup granulated sugar
1 teaspoon vanilla extract
Optional: cornstarch slurry or milk powder
Step-by-Step Instructions:
Combine whole milk, heavy cream, cocoa powder, sugar, and vanilla extract in a bowl.
Whisk thoroughly until the mixture is smooth.
If desired, add a cornstarch slurry and gently heat until slightly thickened. Cool completely.
Refrigerate the mixture for 2–4 hours.
Pour the chilled mixture into a shallow freezer-safe container.
Freeze for 2–3 hours, stirring every 30 minutes.
Once partially frozen, blend until thick and smooth.
Add a small amount of milk if the mixture is too thick.
Freeze a little longer if it is too thin.
Serve immediately once the desired Frosty consistency is reached.
Optional Variations:
High-protein Chocolate Frosty
Keto Chocolate Frosty
Double Chocolate Frosty
Mocha Frosty
Vanilla Frosty
Nutritional Information: Nutrition will vary depending on the exact sugar quantity, dairy products, serving size, and optional ingredients used.